Using Shared Printers
First Time Setup
Computer Setup
YOU ONLY HAVE TO DO THIS ONCE
- Open the
`Kyocera Cloud Print andApplicationScan`Scan
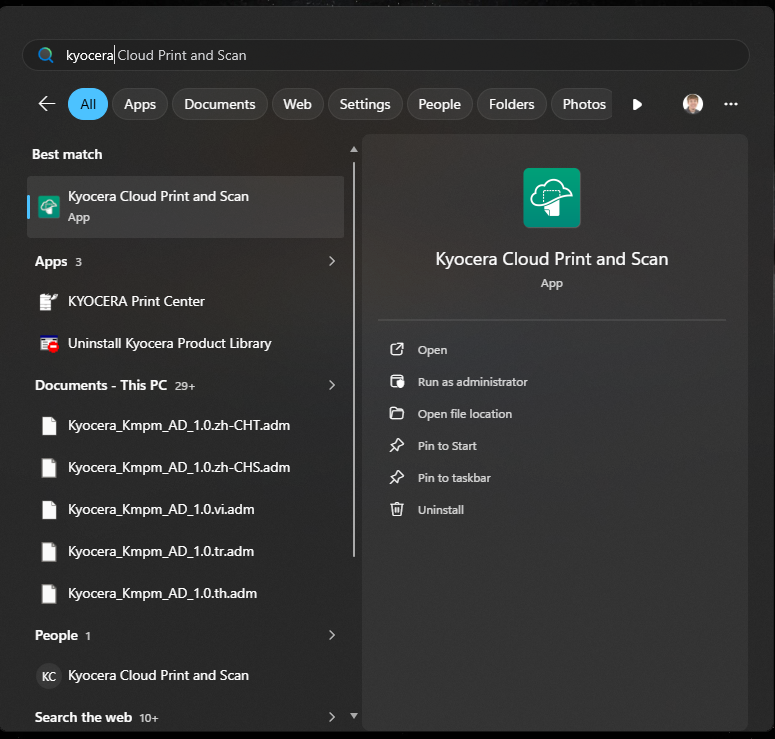
- You can find it on your desktop or by searching for
`Kyocera Cloud Print andScan`Scan
- A window will open asking you to login if you are not already signed in
- Click
Sign in with Microsoft
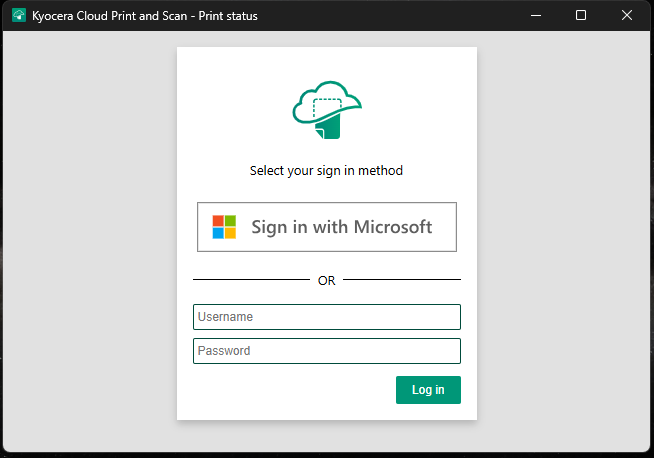
- Your browser will open to the usual Microsoft/JRE sign-in page
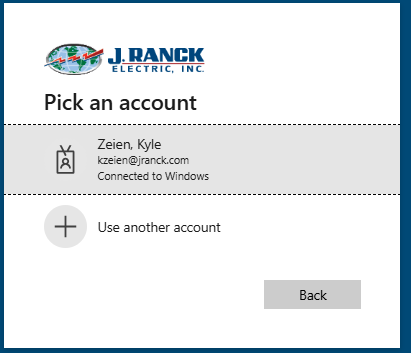
- Sign in to your account and then return to the app
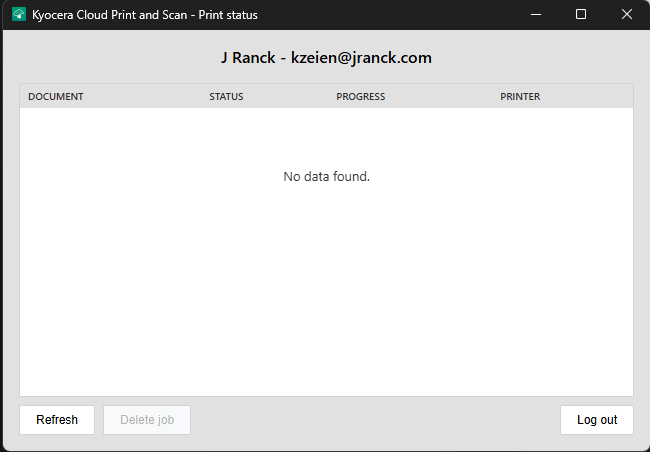
- You should now see a window similar to this
Printer Setup
YOU ONLY HAVE TO DO THIS ONCEONCE. YOU CAN PERFORM THESE STEPS AT ANY PRINTER WITH A BADGE READER. THIS WILL CONFIGURE YOUR BADGE FOR ALL PRINTERS.
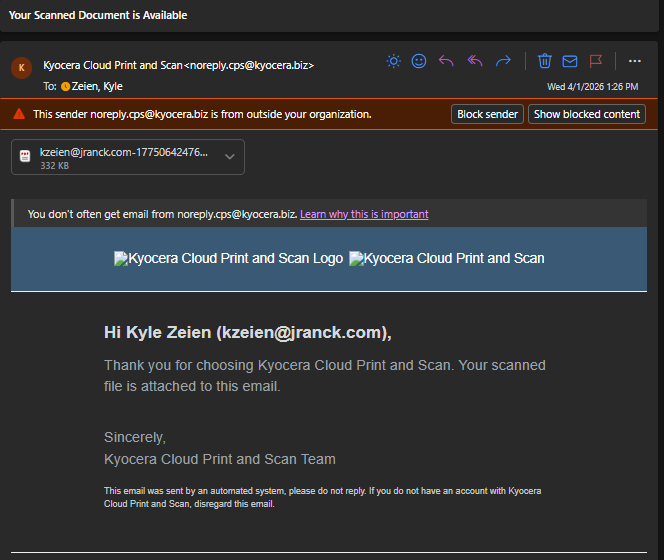
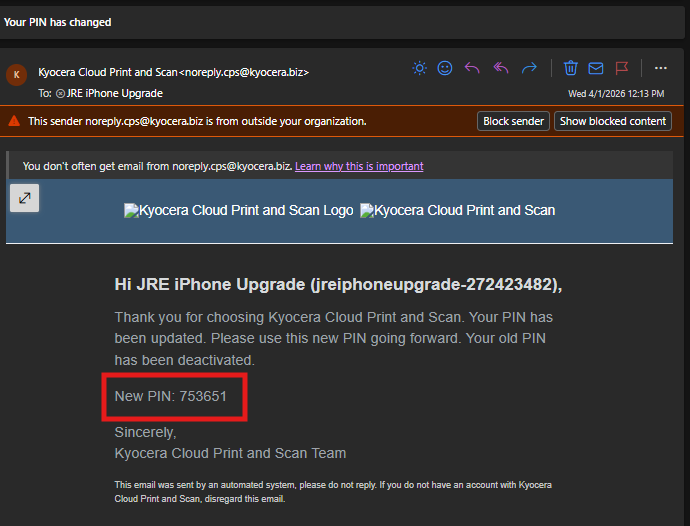
- Locate the email from
`noreply.cps@kyocera.containing your PIN and write it down for a later stepbiz`biz
- Scan your badge on the badge reader
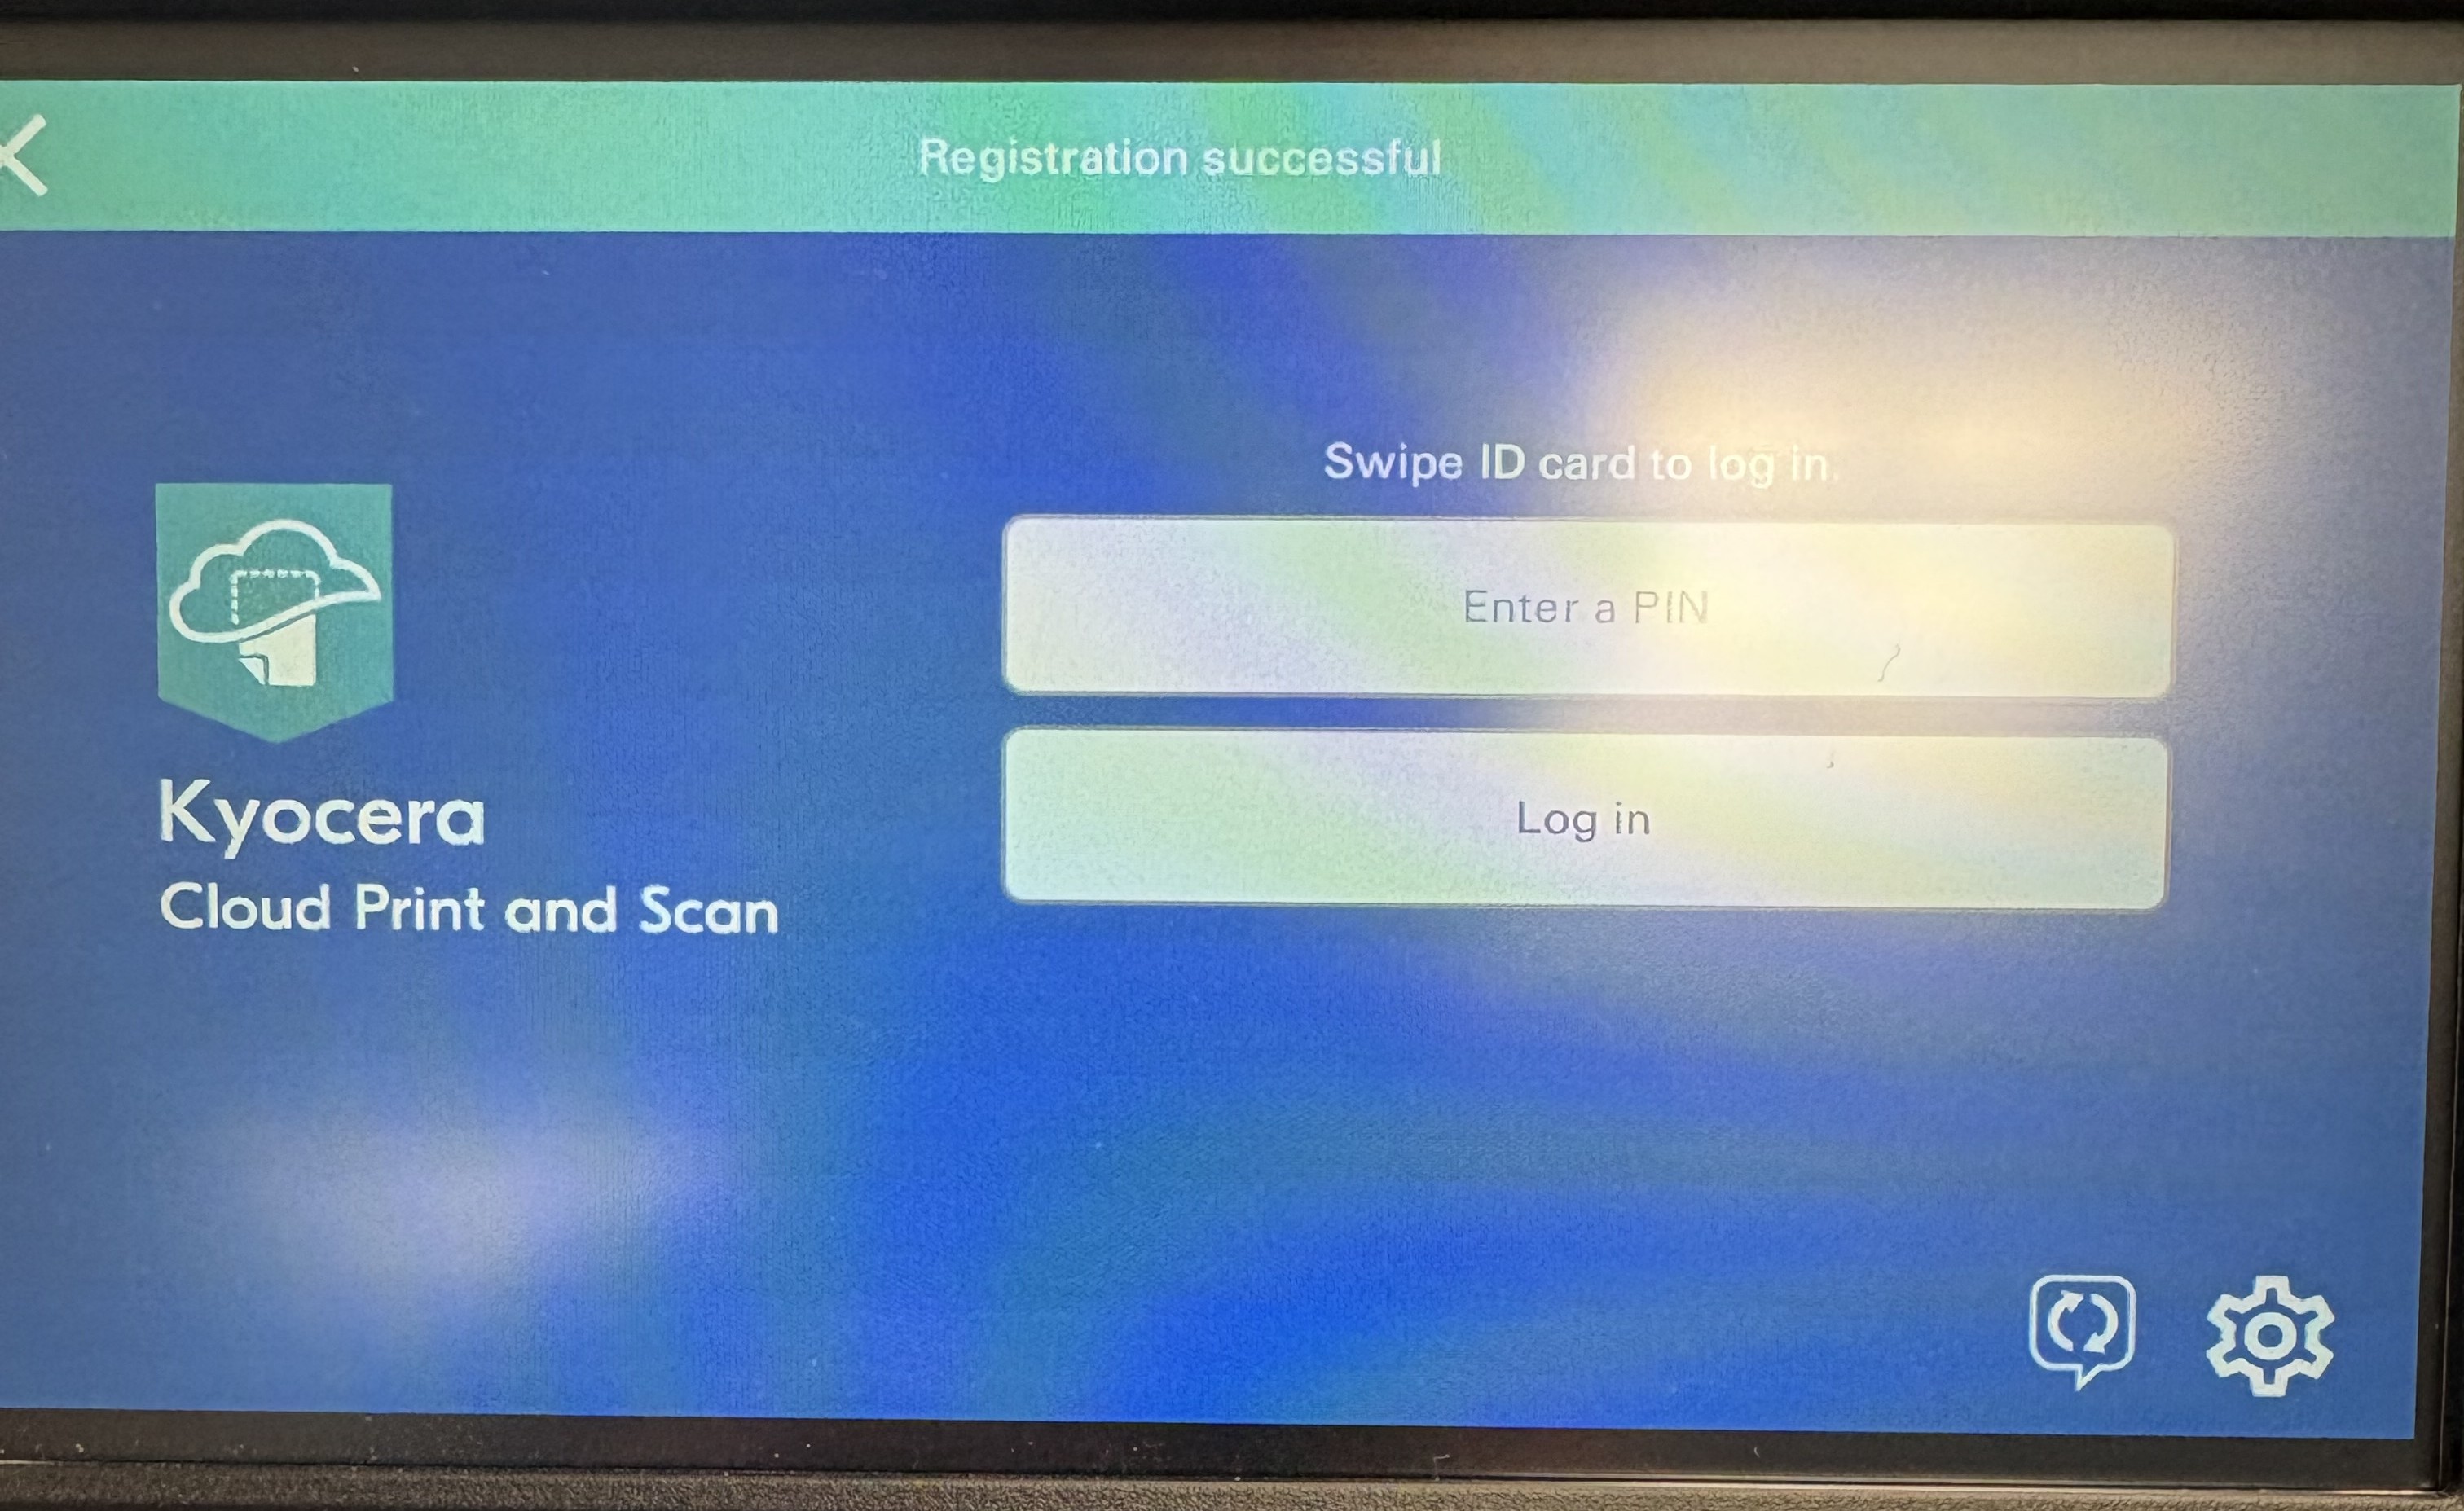
- The printer will display
The ID card is not registered. Register your ID card?
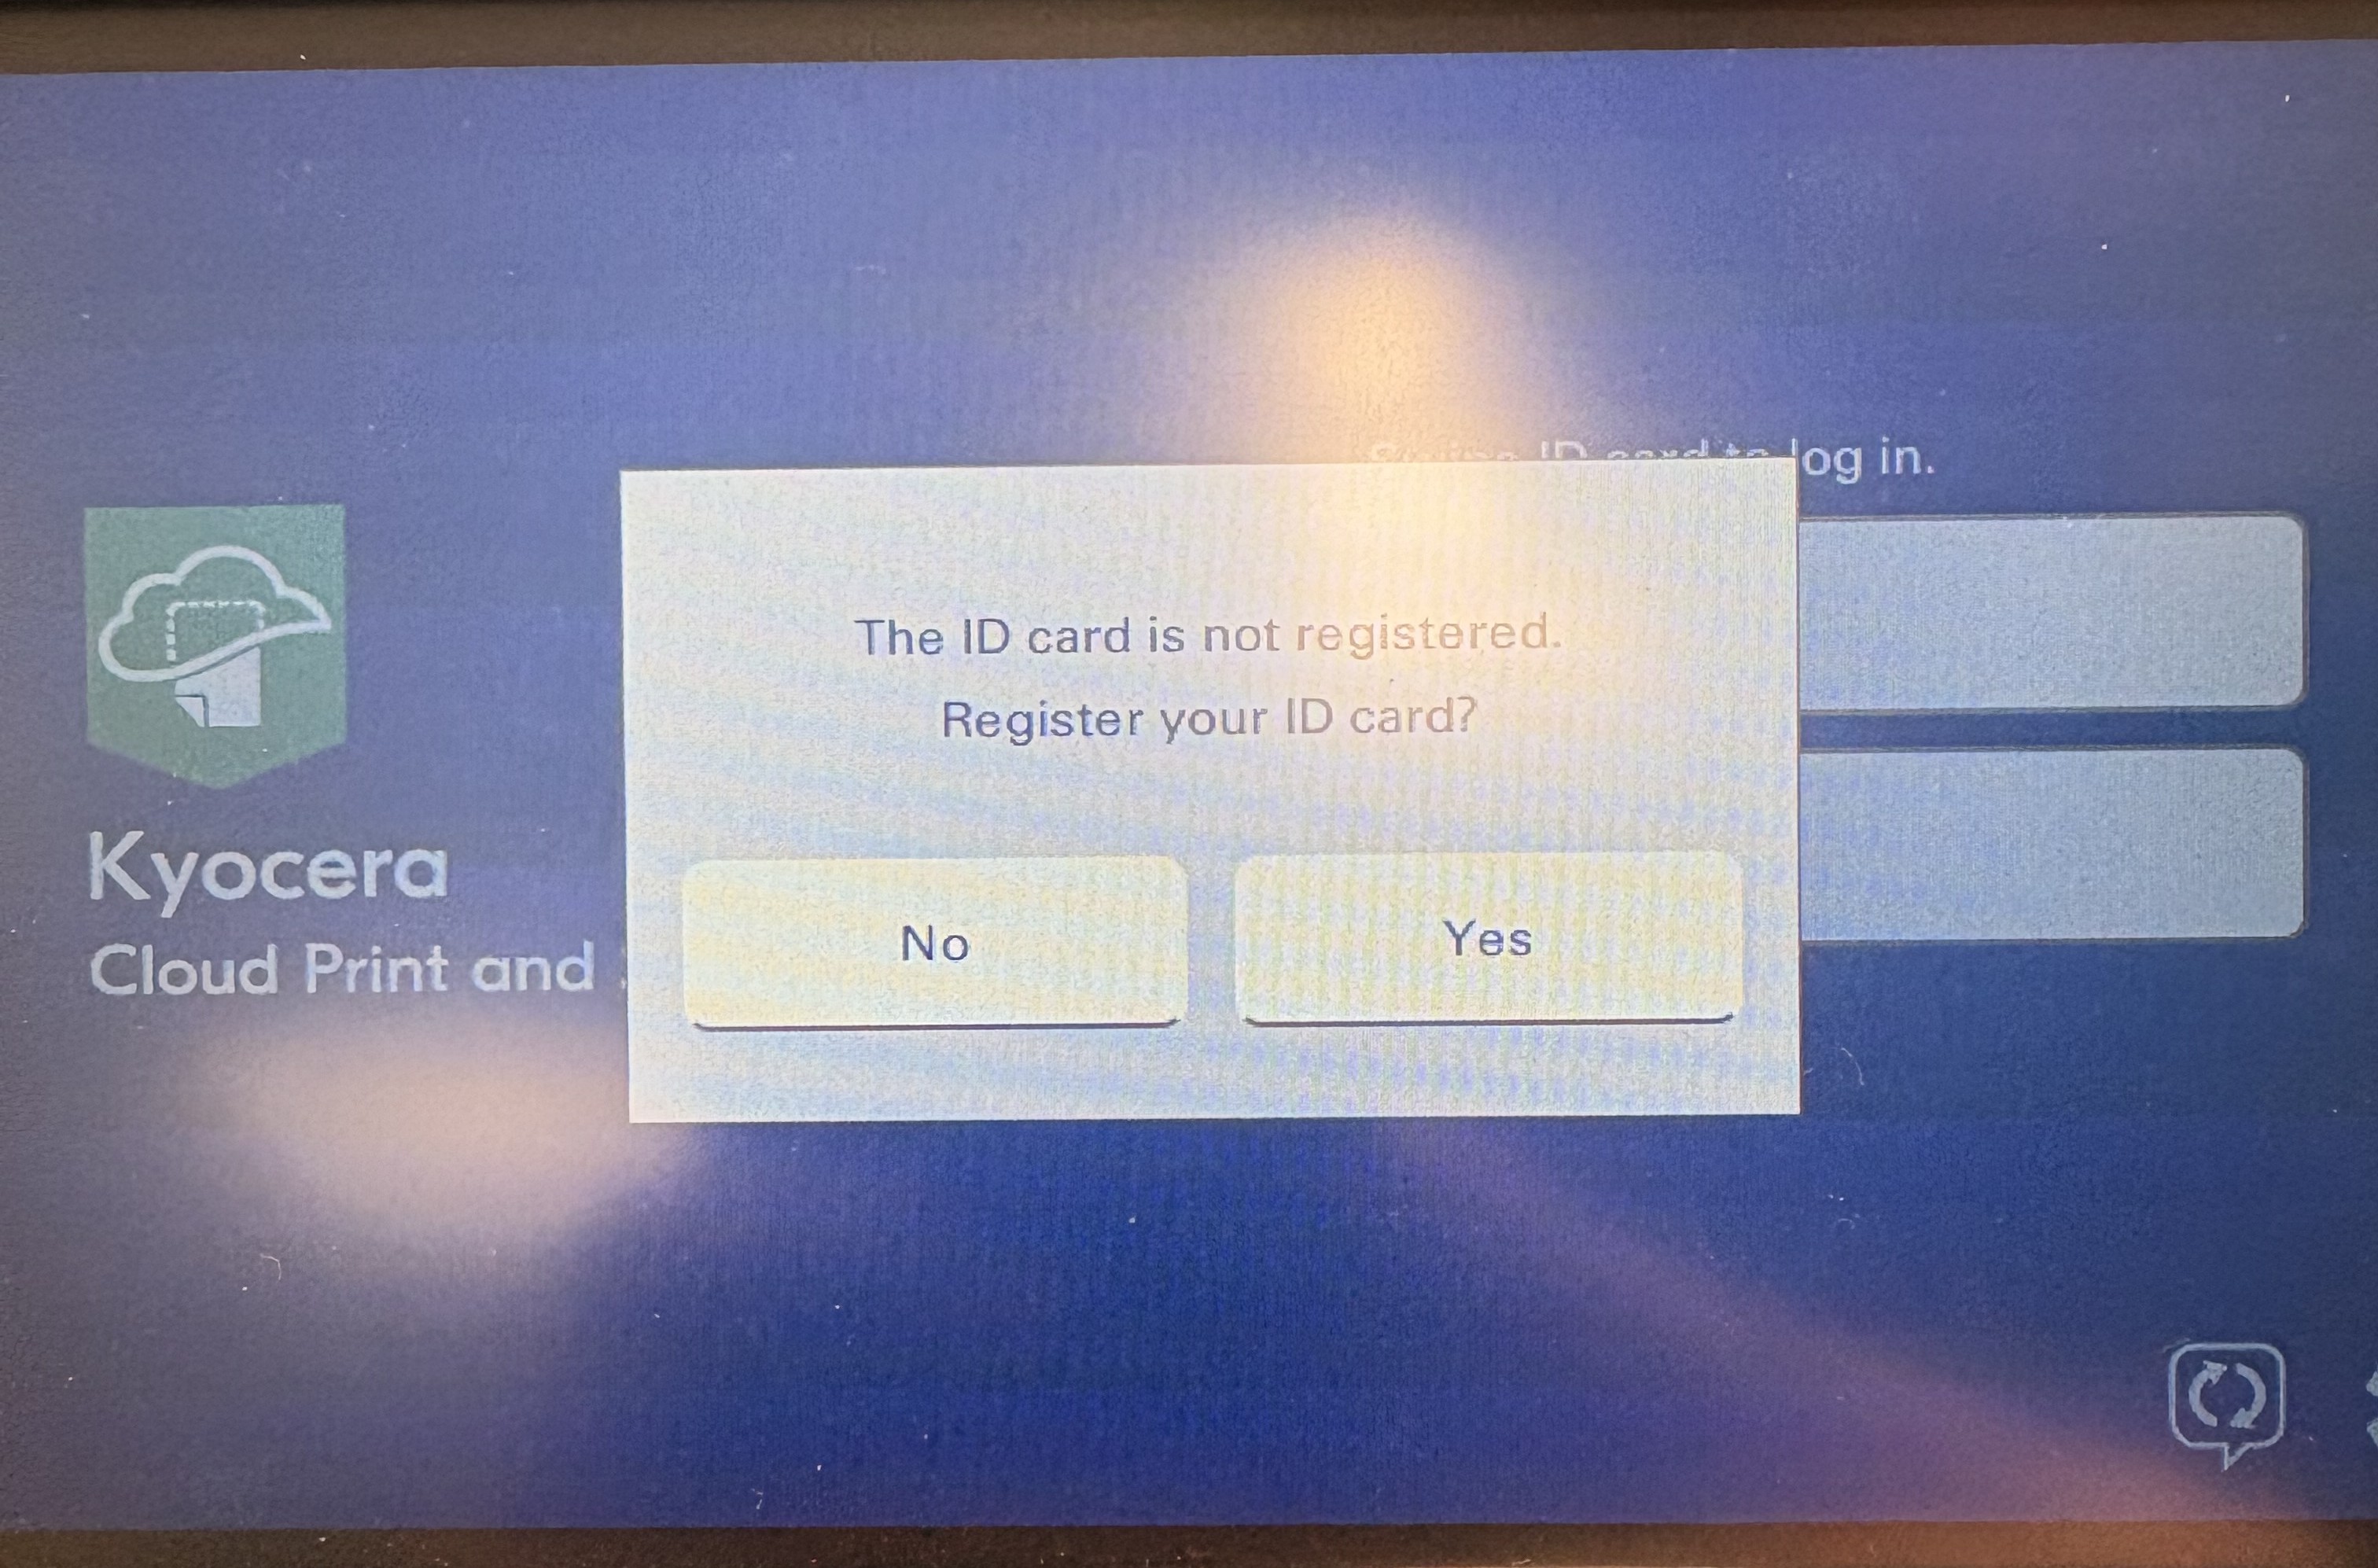
- Tap
Yes - Enter your PIN from the email and then tap Enter
- You will get a notification that the card has been
registeredregistered. This allows you to use your badge on any printers that have a badge reader
- You can now scan your badge to access the Kyocera Cloud Print and Scan application on any printer that has a badge reader
Printing
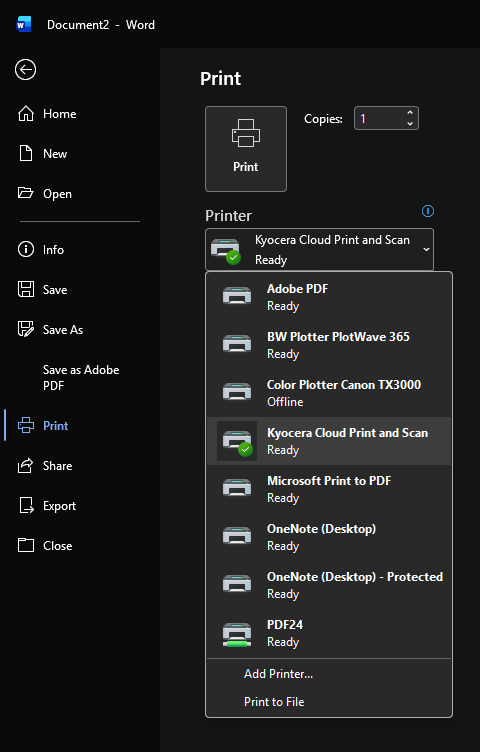
- Select the printer named
Kyocera Cloud Print and Scanand then click Print
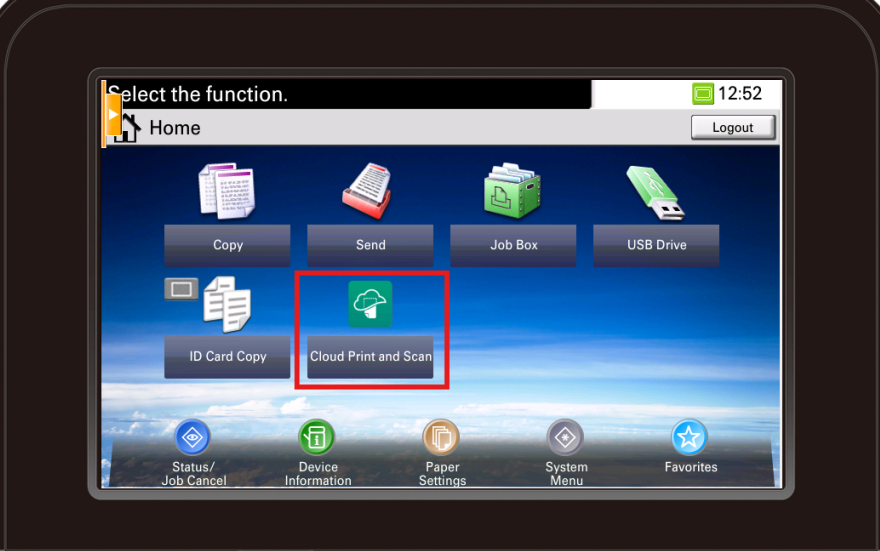
- You can now go to any one of the shared printers
- Scan your badge
- Tap on
Kyocera Cloud Print and Scan
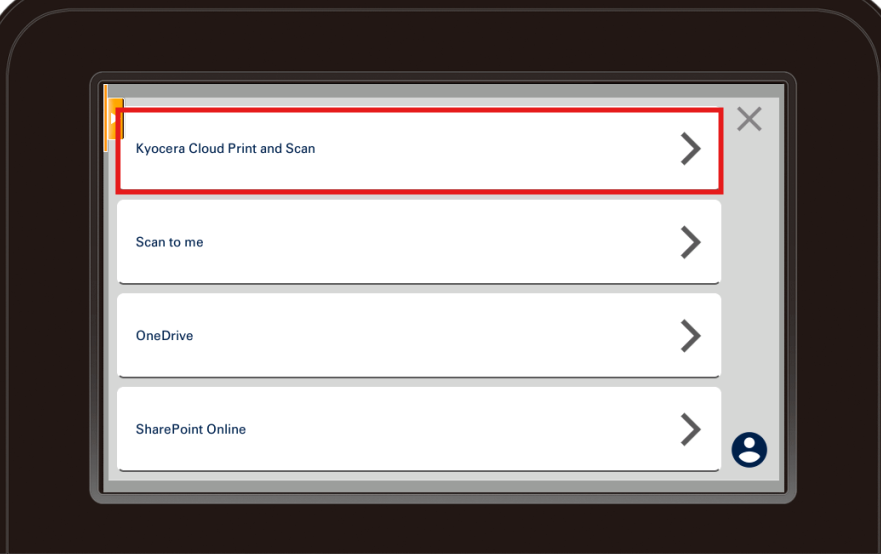
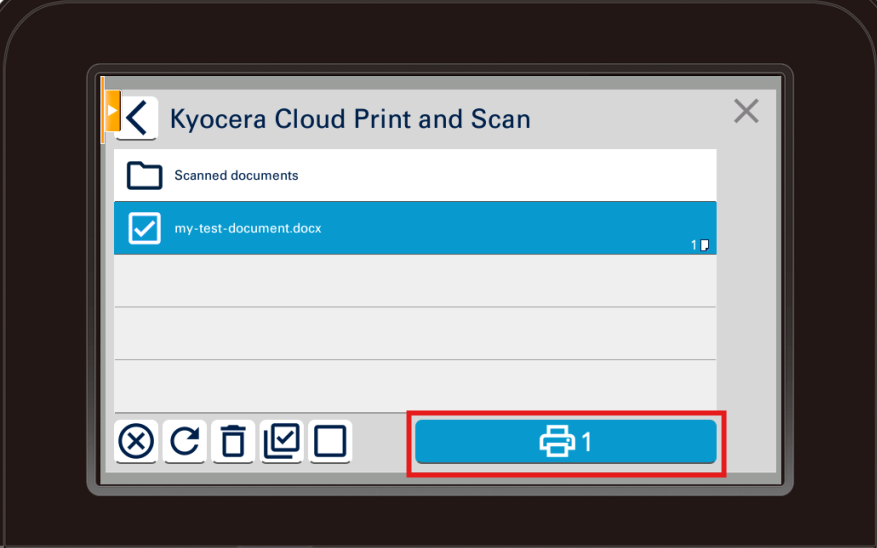
- Tap on your document(s) and then tap the printer icon
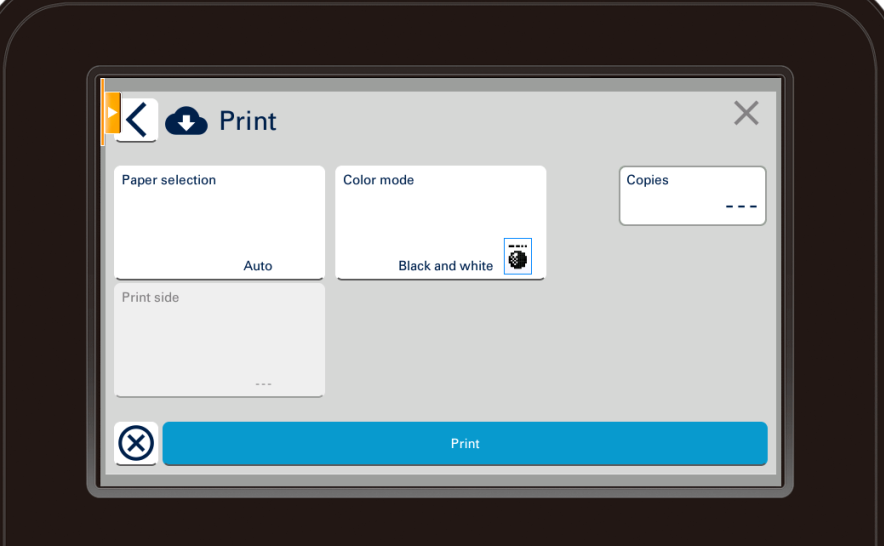
- Change any print settings you desire
- Tap Print
Scanning to Email
- Scan your badge
- Tap on
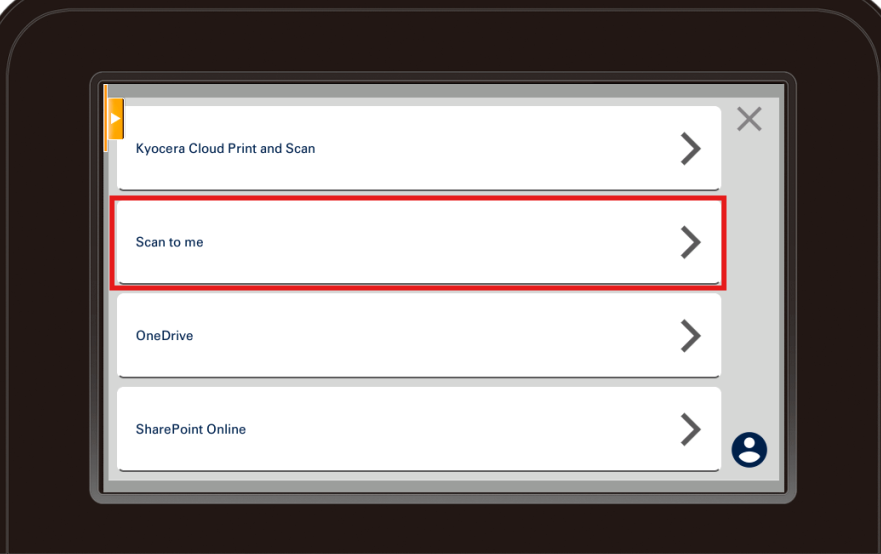
Kyocera Cloud Print and Scan
- Tap
Scan to me
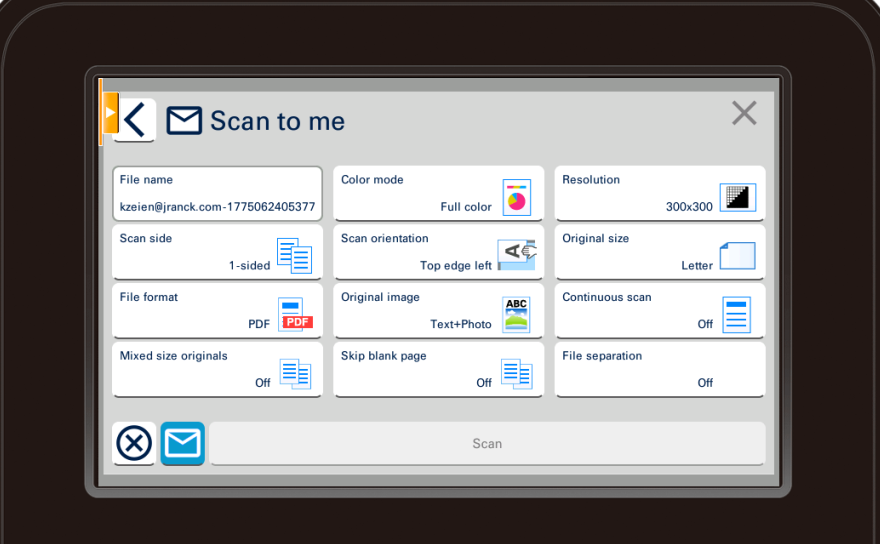
- Select your desired scan settings
- Tap
Scan
- You will receive an email from
noreply.cps@kyocera.bizwith the document attached
- If the file is larger than 10MB, the email will not include the attachment and will instead contain a link to the document