# How to Generate Accountability Site Access Report
##### Purpose:
To explain how to generate an accountability site access report
##### Prerequisite:
- Have OBDC configuration set up on electronic device (laptop/tablet) to allow query refresh to pull active employee list from Spectrum
- Have admin access set up to receive emails with excel attachment from Virtual Keypad
- Have edit access to Share Drive>All Users>MTP>Safety>ACCOUNTABILITY-SITE ACCESS folder
- If any of the above items are needed, contact IT
##### Who's Responsible:
- Safety department
##### Overview:
- All employees must use their badge to access office locations and job sites that are large enough to have keypad set ups for accountability in case of safety issues.
- Employees should not piggy back to get into buildings
- If badges are lost/misplaced/forgotten, employee can enter their assigned pin code to gain access. This will allow the system to log them as checking into the site
- This report will show who has checked into a site, what site, and their phone numbers. It will also show anyone that is an active employee, that has not checked into a site
##### Process:
- Email is received from Virtual Keypad at 8:03 am every morning
- Open the Site Access.xlsx excel spreadsheet
[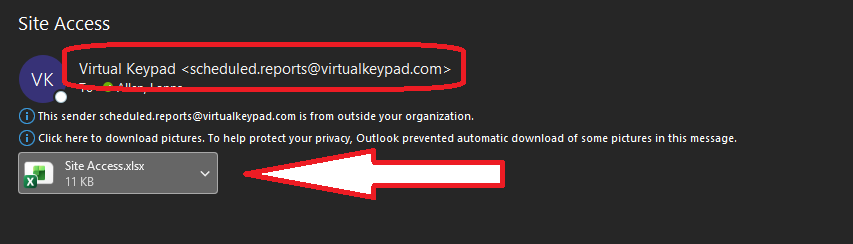](https://docs.jranck.com/uploads/images/gallery/2026-03/screenshot-2026-03-30-122157.png)
- Click on the Enable Editing button at the top
- Delete columns D (Message), E (User No.), G (Area Name), H (Zone No.), I (Zone Name), J (Door Name), K (Output Name), and L (Count)
- To do this left click on the column letter to choose the whole column, then right click to open options and scroll down to Delete option and click it. This removes that column from the spreadsheet.
[](https://docs.jranck.com/uploads/images/gallery/2026-03/screenshot-2026-03-30-121600.png)
- Click on the headers in column 1 to select them all
- Click on the Data tab at the top of the page
- Click on the Filter icon to put filters across the headers
[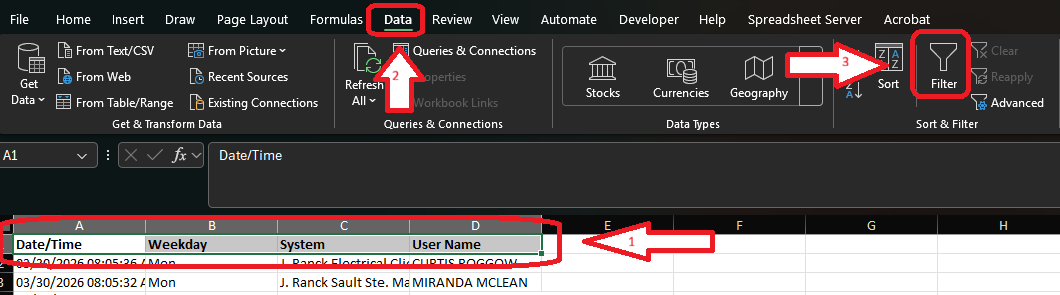](https://docs.jranck.com/uploads/images/gallery/2026-03/screenshot-2026-03-30-123004.png)
- Left click on column D to select the entire column
- Click on Remove Duplicates option in the tool bar
[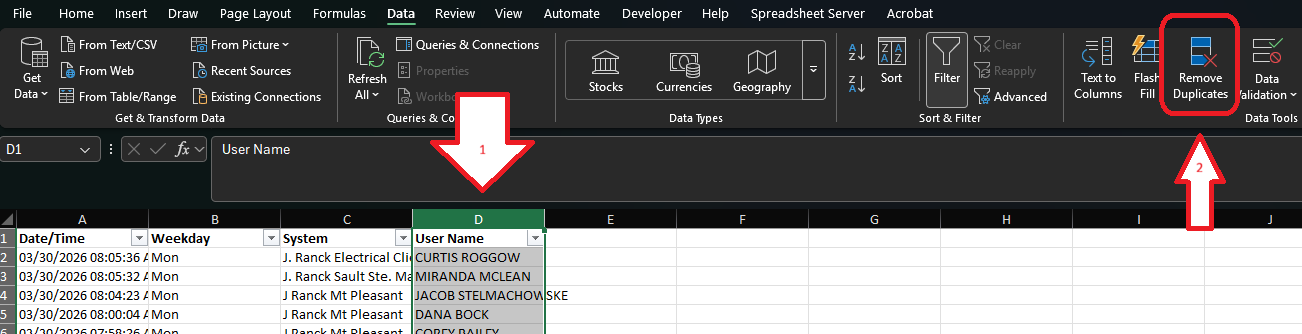](https://docs.jranck.com/uploads/images/gallery/2026-03/screenshot-2026-03-30-123714.png)
- Leave Expand the selection option chosen
- Click Remove Duplicates button
[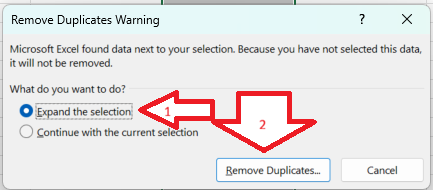](https://docs.jranck.com/uploads/images/gallery/2026-03/screenshot-2026-03-30-124124.png)
- Click Unselect All button
[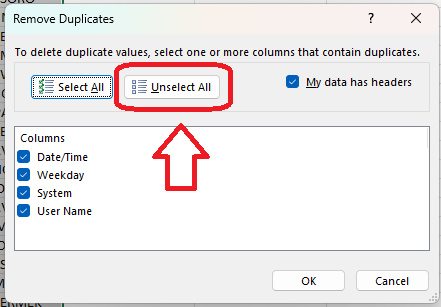](https://docs.jranck.com/uploads/images/gallery/2026-03/screenshot-2026-03-30-124342.png)
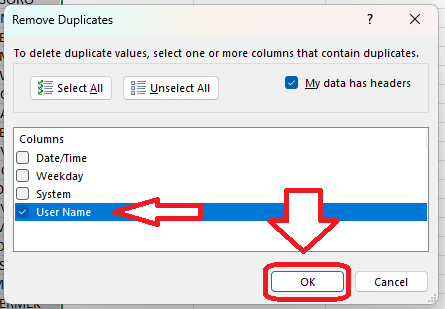
- Click User Name to check the box
- Click Ok
[](https://docs.jranck.com/uploads/images/gallery/2026-03/screenshot-2026-03-30-124555.png)
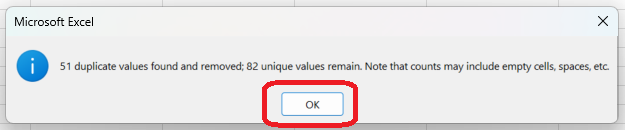
- A message box will pop up with how many duplicates are being removed. Click Ok
[](https://docs.jranck.com/uploads/images/gallery/2026-03/screenshot-2026-03-30-124727.png)
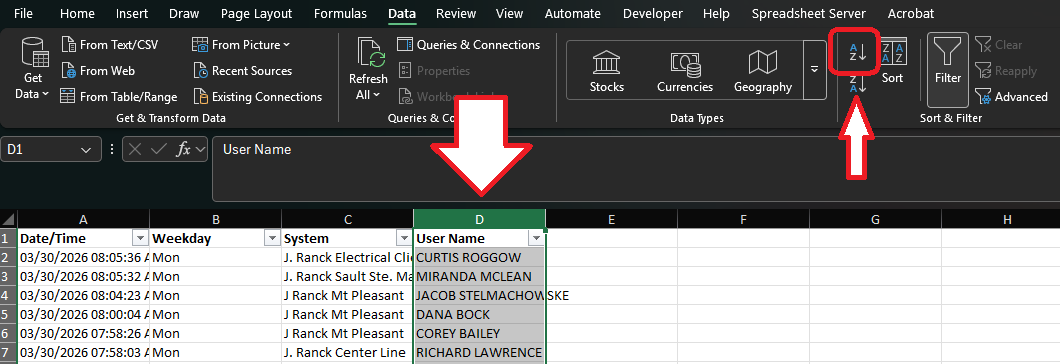
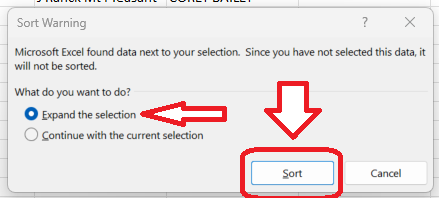
- With column D still chosen, click sort AtoZ option in tool bar
[](https://docs.jranck.com/uploads/images/gallery/2026-03/screenshot-2026-03-30-125028.png)
- Leave Expand the selection option chosen
- Click Sort button
[](https://docs.jranck.com/uploads/images/gallery/2026-03/screenshot-2026-03-30-125358.png)
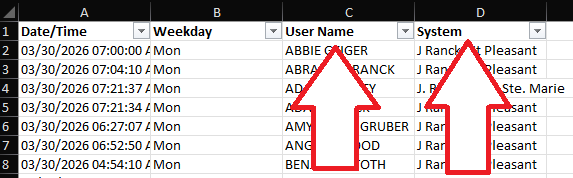
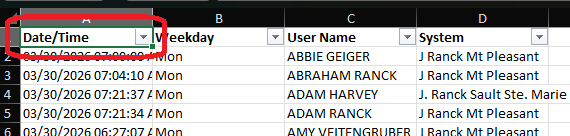
- Right click on column D to select it
- Click on Cut option
- Right click on column C
- Click on Insert Cut Cells option
- This moves the User Name column to be before the System column
[](https://docs.jranck.com/uploads/images/gallery/2026-03/screenshot-2026-03-30-130151.png)
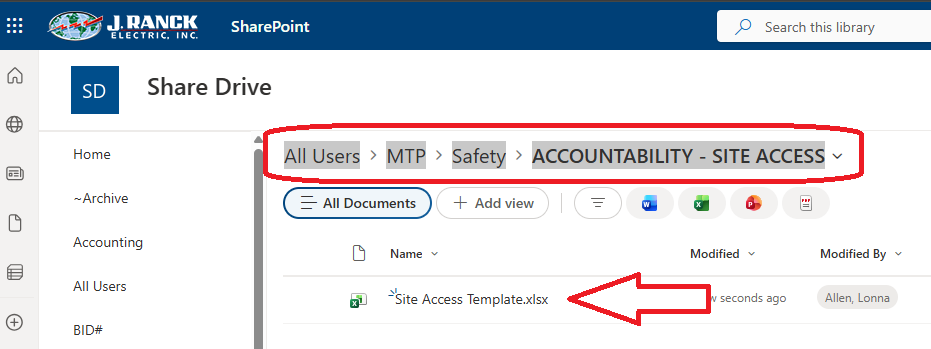
- Open the Site Access Template.xlsx from the Share Drive All Users>MTP>Safety>ACCOUNTABILITY-SITE ACCESS
[](https://docs.jranck.com/uploads/images/gallery/2026-03/screenshot-2026-03-30-130852.png)
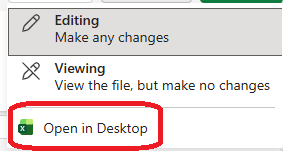
- Click on the Editing button in the upper right corner
[](https://docs.jranck.com/uploads/images/gallery/2026-03/screenshot-2026-03-30-131151.png)
- Click on Open in Desktop option
[](https://docs.jranck.com/uploads/images/gallery/2026-03/screenshot-2026-03-30-131255.png)
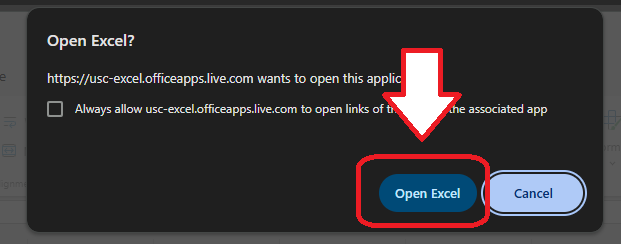
- Click Open Excel button
[](https://docs.jranck.com/uploads/images/gallery/2026-03/screenshot-2026-03-30-131350.png)
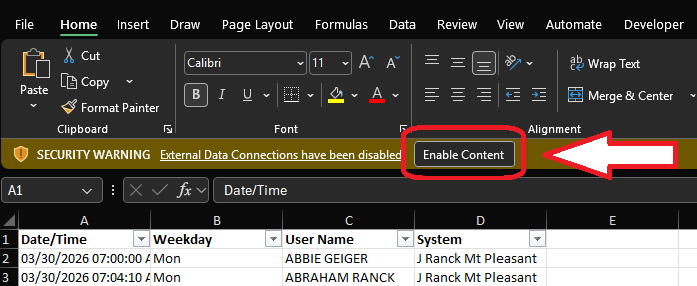
- Click on Enable Content button
[](https://docs.jranck.com/uploads/images/gallery/2026-03/screenshot-2026-03-30-131531.png)
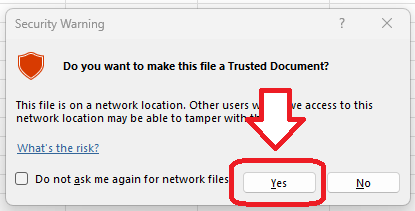
- If prompted with a Security Warning, click on Yes option for Trusted Document
[](https://docs.jranck.com/uploads/images/gallery/2026-03/screenshot-2026-03-30-131649.png)
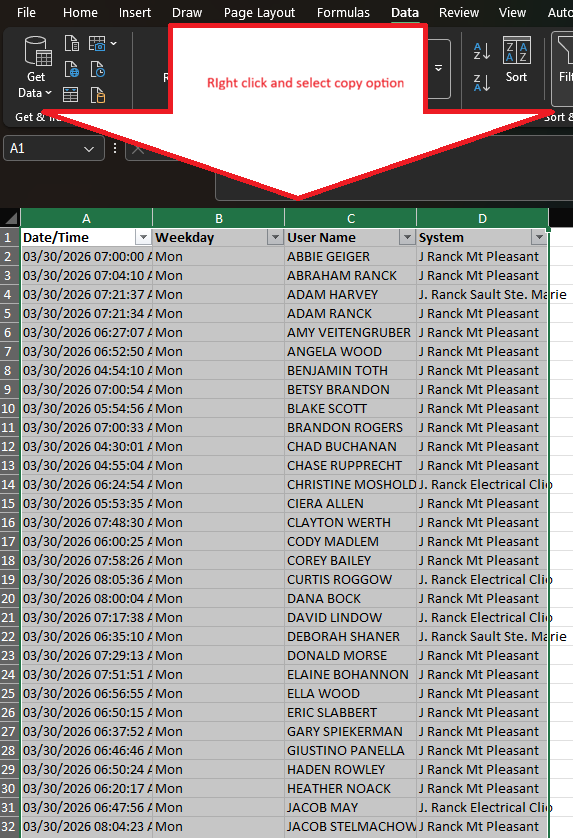
- Go back to the first spreadsheet that was cleansed and highlight columns A - D
- Right click and select Copy option
[](https://docs.jranck.com/uploads/images/gallery/2026-03/screenshot-2026-03-30-131955.png)
- Move back to the template and make sure the OnSite tab is displaying
- Click on A1 cell to select it
[](https://docs.jranck.com/uploads/images/gallery/2026-03/screenshot-2026-03-30-132448.png)
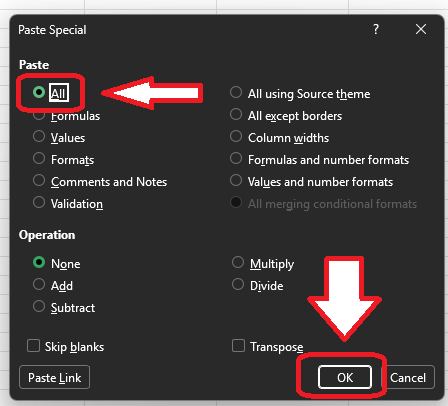
- Right click and select Paste Special option
- Leave All the selection option
- Click Ok button
[](https://docs.jranck.com/uploads/images/gallery/2026-03/screenshot-2026-03-30-132556.png)
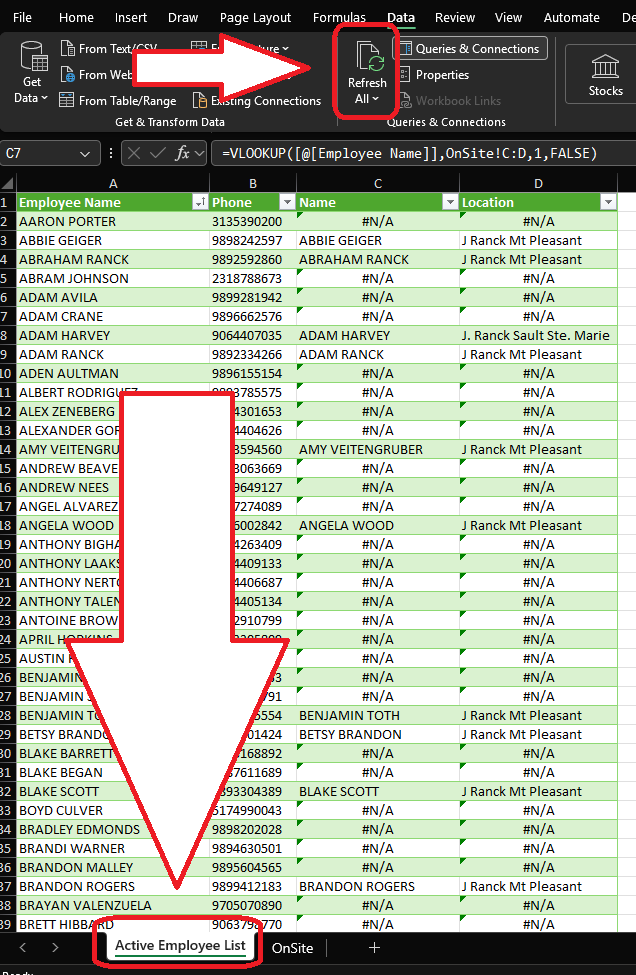
- Click on the Active Employee List tab in the template
- Click on the Refresh All option in the tool bar. This brings in the most current active employee list from Spectrum
[](https://docs.jranck.com/uploads/images/gallery/2026-03/screenshot-2026-03-30-134415.png)
- The report will show all employees names and location of who checked in using the keypads. Those that did not use the keypad will show N/A
- This information can then be filter for employee names or by N/A to see who did not check in. It can also be filtered by location to see who checked in at each site **NOTE:** the employee name needs to be entered in the virtual keypad software the same way it is entered into Spectrum. If it is not the same the lookup will not work correctly in the spreadsheet.
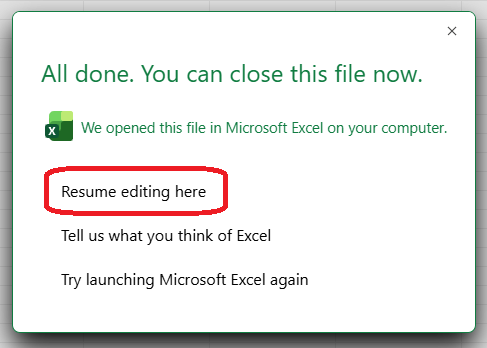
- Once the template has been updated it can be closed and a prompt will ask to close the file on Share Drive. Make sure to click Resume editing here option to allow the most current employee report to be save in Share Drive until the next update the next day.
[](https://docs.jranck.com/uploads/images/gallery/2026-03/screenshot-2026-03-30-135459.png)
##### Troubleshooting:
- Submit a ticket to IT